
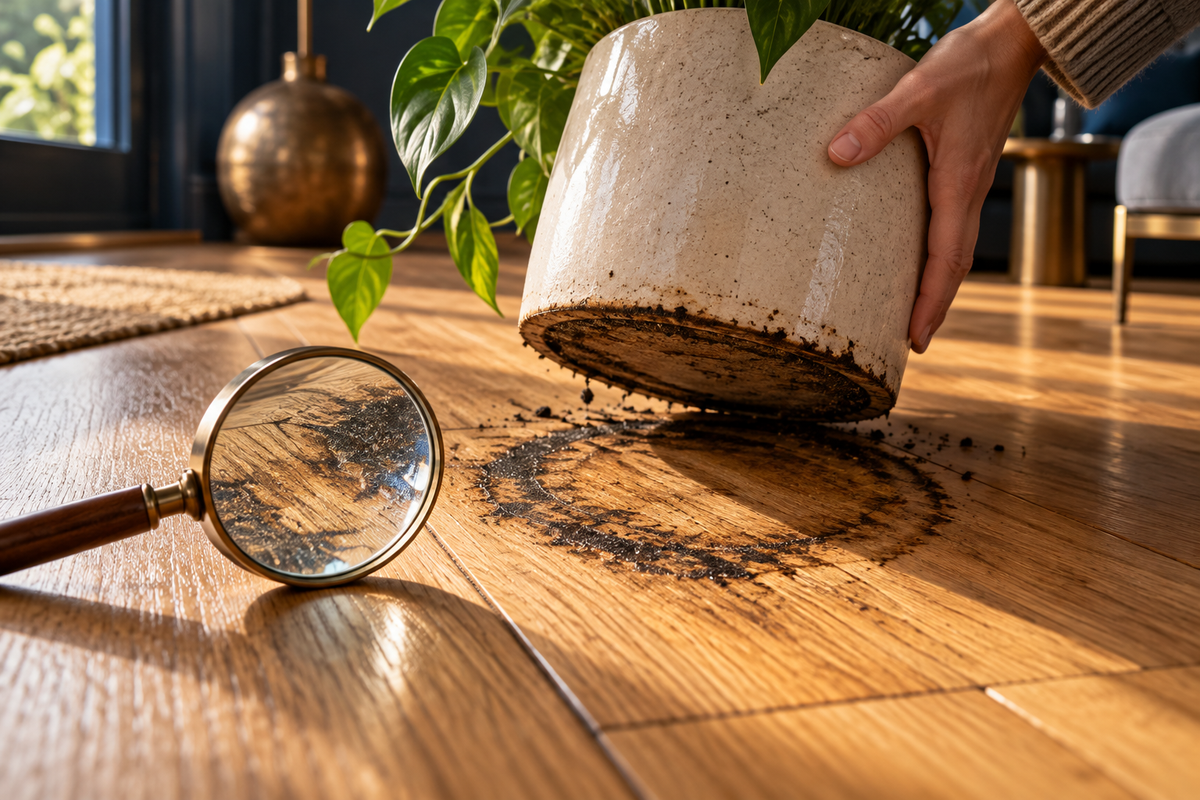
Black stains on timber floors may come from moisture, a reaction within the wood, pet accidents or a surface contaminant. Some marks clean off; deeper discolouration may need professional treatment, sanding or board replacement, and complete removal is not always possible. Stop any ongoing moisture first, identify the finish and stain depth, and avoid bleach or aggressive spot sanding before the floor has been assessed.
| What you notice | What it may indicate | Sensible response |
|---|---|---|
| Dark material sitting on an otherwise intact finish | Dirt, transferred colour or another contaminant | Try only the approved cleaning method after a discreet test |
| A dark ring under a pot or damp object | Moisture-related discolouration | Remove the moisture source and assess the coating and timber |
| Black marks around metal fixings | A possible iron-related reaction in the timber | Check moisture and the fixing before choosing treatment |
| A dark patch with swelling, softness or repeated dampness | Damage extending beyond appearance | Investigate the water source and board condition before refinishing |
| A stain that remains after appropriate cleaning | Damage in the finish or timber | Assess controlled treatment, sanding limits and replacement options |

What Causes Black Stains on Timber Floors?
Black is a description of the mark, not a diagnosis. Its location, history and behaviour matter more than whether an online photograph looks similar.
Moisture and reactions within the timber
Water left beneath a planter, leaking appliance or wet mat can reach vulnerable joints or worn areas. Darkening may develop inside the wood rather than sitting on the coating. A mark under a pot should prompt a check of the pot, saucer and surrounding floor, not just a search for a stronger cleaner.
Pet accidents and other contaminants
Urine, dyes, ink and oily products can produce different kinds of persistent marking. The ATFA information sheet on coating reactions explains that urine-related darkening can involve ammonia reacting with timber tannins. This is one reason a stain may remain after the surface is cleaned. Odour or contamination beneath the surface needs separate attention.
Metal, dirt and biological growth
A dark mark near a nail can suggest a reaction involving metal and moisture, while tracked-in grime may simply sit on top. Fuzzy growth, persistent mustiness or soft timber warrants investigation. Colour alone does not establish mould, rot or an active leak, so avoid labelling every black patch the same way.

How to Tell Surface Marks from Deeper Damage
The first inspection should gather clues without stripping the finish. Photographs taken before cleaning also help preserve the pattern that may explain where the mark came from.
- Look across the surface in side lighting. A coating that is flaking, worn through or visibly changed suggests more than ordinary dirt.
- Note whether the mark follows timber grain, surrounds a fixing or crosses several boards in the shape of a spill.
- Check the nearby source: pot, appliance, doorway, bathroom edge, pet area or recently used product.
- Record whether the floor feels raised, moves underfoot or has a damaged joint. Do not probe suspected soft areas with sharp tools.
- Use only an appropriate cleaner on a small inconspicuous area if the finish is intact and its care instructions are known.
- Stop if cleaning changes the sheen, softens the coating or transfers finish onto the cloth.
- Treat continuing dampness as a cause to investigate, even if the visible mark has stopped growing.
A photograph cannot show the full depth of a stain. Timber floor repairs may require an on-site examination to establish whether the damage is confined to the coating, penetrates the timber or accompanies a failing board.
What to Do Before Trying Stain Removal
Preventing further exposure is more useful than repeatedly attacking a stain. Preserve the floor’s current condition until there is a clear reason to remove material or apply a treatment.
- Lift the wet object or mat and stop the spill or leak where it is safe to do so. Avoid dragging a heavy planter across a vulnerable surface.
- Blot remaining liquid with an absorbent cloth rather than spreading it into surrounding joints.
- Keep the affected area visible. Covering a damp patch with an impermeable mat can conceal whether the problem is improving.
- Keep product labels or photographs if a cleaner, dye or other chemical caused the mark. That information may change the repair method.
- Find the flooring and finish details, including whether the floor is solid timber or engineered.
- Keep pets and foot traffic away from wet, softened or damaged areas until they are safe to use.
- Obtain help for active water damage, widespread growth or a visibly unstable floor before considering appearance.

Can Cleaning, Sanding or Treatment Remove the Stain?
The appropriate method depends on where the discolouration sits and what the floor can tolerate. Removing every trace is not a sensible goal if doing so would damage the remaining timber.
Cleaning when the mark is above the finish
An approved cleaning process may lift dirt or transferred material from a sound coating. If a properly tested clean makes no difference, repeated scrubbing does not prove a stronger product is needed. It may simply mean the mark is below the surface or that the coating itself has changed.
Sanding where adequate timber remains
Sanding can reduce a stain contained within the removable surface layer. A deeper mark can remain after the surrounding wood looks fresh. Engineered boards need particular care because the usable timber face is limited, while solid boards also have constraints from previous sanding and their construction. Agree in advance how residual marks will be handled.
Specialist treatment after diagnosis
Certain wood treatments can lighten suitable discolouration, but compatibility depends on the stain, timber and coating system. Oxalic-acid products and peroxide-based treatments are not interchangeable household solutions. A professional test area can help show whether treatment improves the stain or creates a lighter patch that is harder to blend. Do not mix cleaners or improvise chemical combinations.
| Repair route | What it can achieve | What it cannot promise |
|---|---|---|
| Approved surface cleaning | Remove a compatible surface contaminant | Remove deep timber discolouration |
| Controlled sanding | Remove damaged material within the safe allowance | Eliminate stains extending beyond that allowance |
| Suitable specialist treatment | Lighten some identified stains | Identical colour across treated and untreated boards |
| Board replacement | Remove a locally damaged section | An invisible match to aged surrounding timber |
The scope of wood floor refinishing in Sydney should reflect those limits instead of promising that every dark mark will disappear.

When Stained Floorboards Need Replacing
Replacement becomes relevant when the damage is deeper than a safe surface repair or the board has lost its integrity. A board that is soft, split, delaminating or affected by ongoing deterioration needs a different assessment from a hard, stable board with an old stain. Solving the source remains necessary whichever repair is chosen.
A local replacement is not automatically a whole-floor replacement. The installation method, access, joint condition and availability of suitable timber determine what can be removed and reinstated. With engineered flooring, identifying the product and its locking or bonding system is particularly useful before work begins.
Matching involves more than buying the same species. Board width, grade, grain, age, colour and finish all influence the result. A new board may remain distinguishable, especially near faded timber. Discuss a realistic blend under normal room lighting, and whether adjoining areas need refinishing, rather than relying on a promise of an invisible patch.
Why DIY Bleaching and Spot Sanding Can Go Wrong
A small stain can become a much larger repair if the surrounding finish is damaged. Internet remedies rarely account for the exact coating, veneer thickness or previous treatments on your floor.
- Household bleach can affect finishes and wood colour without resolving the original cause. More concentration is not a dependable path to a better result.
- Repeated peroxide applications may create a pale halo, especially when the stain and surrounding timber respond differently.
- Steel wool can scratch some coatings, and particles left behind can introduce further staining where moisture is present.
- Concentrated spot sanding can form a depression. The stain may still be visible, now surrounded by an uneven surface.
- Adding a dark stain can disguise contrast but does not repair decay, remove contamination or correct wet timber.
- Applying a new finish over an inadequately prepared patch can create adhesion and sheen problems.
If you have already tried a product, tell the assessor what it was and where it was applied. That history is useful, even when the trial did not work.

How to Stop Dark Stains Returning
Prevention depends on the source rather than a single protective product. A sound finish helps, but it should not be treated as a waterproof barrier against prolonged exposure.
- Inspect plant pots and saucers regularly, including the surface beneath them. Use arrangements that make leaks visible instead of trapping them out of sight.
- Replace damp entrance mats and let both the mat and the floor dry appropriately before putting them back.
- Deal with appliance and plumbing leaks promptly, including slow leaks that only appear during use.
- Clean pet accidents promptly using a method compatible with the finish, and check hidden areas beneath rugs.
- Avoid leaving metal containers or wet objects directly against the floor.
- Maintain the finish before heavy wear exposes bare timber, following the coating supplier’s guidance.
- Keep photographs of a repaired area so changes can be recognised early rather than guessed from memory.
Frequently Asked Questions
Stain removal depends on more than the darkness of a mark. These answers clarify the decisions that are most useful before starting treatment.
Can black water stains be sanded out completely?
Sometimes, but not always. A stain near the surface may reduce or disappear within the safe sanding allowance. If discolouration extends deeper, further sanding could remove too much timber. A test and assessment help establish whether treatment, acceptance or board replacement is more appropriate.
Do black stains mean there is mould under the floor?
No. Moisture reactions, metal, pet accidents and pigments can also cause dark marks. Visible growth, recurring dampness, mustiness or deterioration needs investigation, but the colour of a photograph cannot confirm mould beneath the boards. Avoid disturbing suspected damaged material without an appropriate assessment.
Can black stains be removed from engineered timber?
The options depend on the remaining veneer and the depth of the damage. Cleaning may help a surface mark, while full sanding may be unsuitable for a thin or previously refinished face. An affected board may need replacement where the stain extends beyond safe restoration limits.
Should I use bleach or hydrogen peroxide first?
Neither should be the default first step. Identify the finish, stop moisture and establish the likely cause before choosing treatment. Chemicals can alter both the coating and the wood, making a local stain more conspicuous. Product-specific professional testing is preferable to repeated household experiments.
Will a darker floor stain hide the black patch?
It may reduce the contrast, but the result can still be uneven. Darker colour does not correct active moisture, structural damage or contamination. Test the intended appearance and assess the underlying condition before deciding whether recolouring is an acceptable part of the restoration.
Have Your Stained Timber Floor Assessed in Sydney
The right repair starts with understanding the mark, not selecting the strongest cleaner. Clear photographs and the history of the stain help narrow down the likely options.
Send 5 Star Wood Care Sydney a close-up, a wider room view and details of any leak or product already used. Mention whether the stain is changing or the boards feel different underfoot.
Book a timber floor assessment to discuss repair, refinishing and the appearance that can realistically be achieved.