

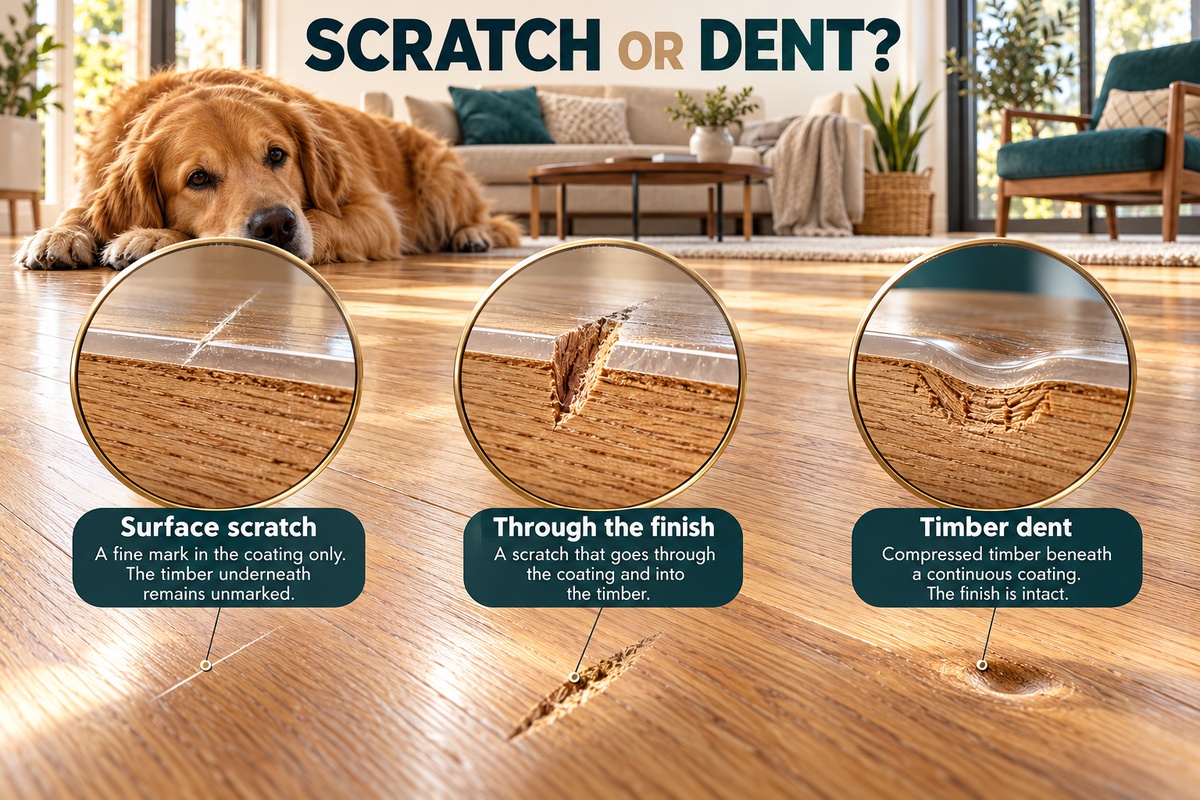
Dog scratches on timber floors do not always require a full sand. Fine marks in a sound finish may suit compatible maintenance or recoating, while scratches through the coating, deep gouges and widespread wear need a different assessment. A dent can also leave the coating intact while compressing the wood underneath. Identify the floor and finish first: the right repair depends on the damage, remaining timber and whether the new treatment will bond.
| What the marks look like | What may be affected | Appropriate next step |
|---|---|---|
| Fine lines visible mainly in reflected light | The protective finish | Clean correctly, then assess compatible maintenance or recoating |
| A line exposing a different timber colour | Coating and possibly wood | Assess repair depth and whether sanding is suitable |
| A depression with an apparently continuous finish | Compressed timber beneath the coating | Assess the indentation; extra coating will not level the wood |
| Deep isolated gouges | Timber surface or board edge | Consider local repair or board replacement |
| Scratches across worn traffic lanes | A larger coating and wear problem | Assess room-wide refinishing or a suitable recoat |
| Dark marks near pet accidents | Staining rather than scratches alone | Investigate penetration and moisture before choosing treatment |
| Marks on engineered boards of unknown specification | A floor with unconfirmed sanding capacity | Identify the product and usable top layer first |
How Deep Are the Dog Scratches on Timber Floors?
Two floors can show similar claw marks but need different repairs. The useful distinction is what has been damaged, not simply how noticeable the lines look.
Fine scratches within the coating
Light scratches can become obvious when daylight crosses the floor, even if the timber itself remains undamaged. Cleaning may remove dirt that exaggerates them, but cleaning does not rebuild a missing finish. Where the coating is sound, an approved maintenance product or professional recoat may improve the appearance.
Check the surface after it is clean and dry. A photograph taken from above may hide marks that appear under a low window reflection, so inspect from normal standing positions as well.
Scratches through the finish
A deeper line can cut through the protective coating and expose wood. It may appear lighter or darker than the surrounding surface, depending on the finish and timber. Its repair involves both appearance and restoring suitable protection.
A fingernail catching on a mark is a clue to surface relief, not a complete diagnosis. It does not reveal the flooring product, remaining wear layer or whether the surrounding finish will accept another coat. Those details still need checking before sanding begins.
Dents and compressed timber
Claws can leave depressions as well as scratches. A coating may follow an indentation without breaking, so a visible mark does not always mean the protective layer has failed.
Applying more finish does not make compressed timber flat. It may change the reflection while leaving the depression visible. Decide whether the priority is improving surface protection, reducing visible marks or achieving a flatter surface; these are related but different goals.
Check the Floor and Finish Before Choosing a Treatment
The repair needs to suit the material already installed. Gather the available product history before adding anything that could complicate the next treatment.
- Establish whether the floor is solid timber, engineered timber or a wood-look product.
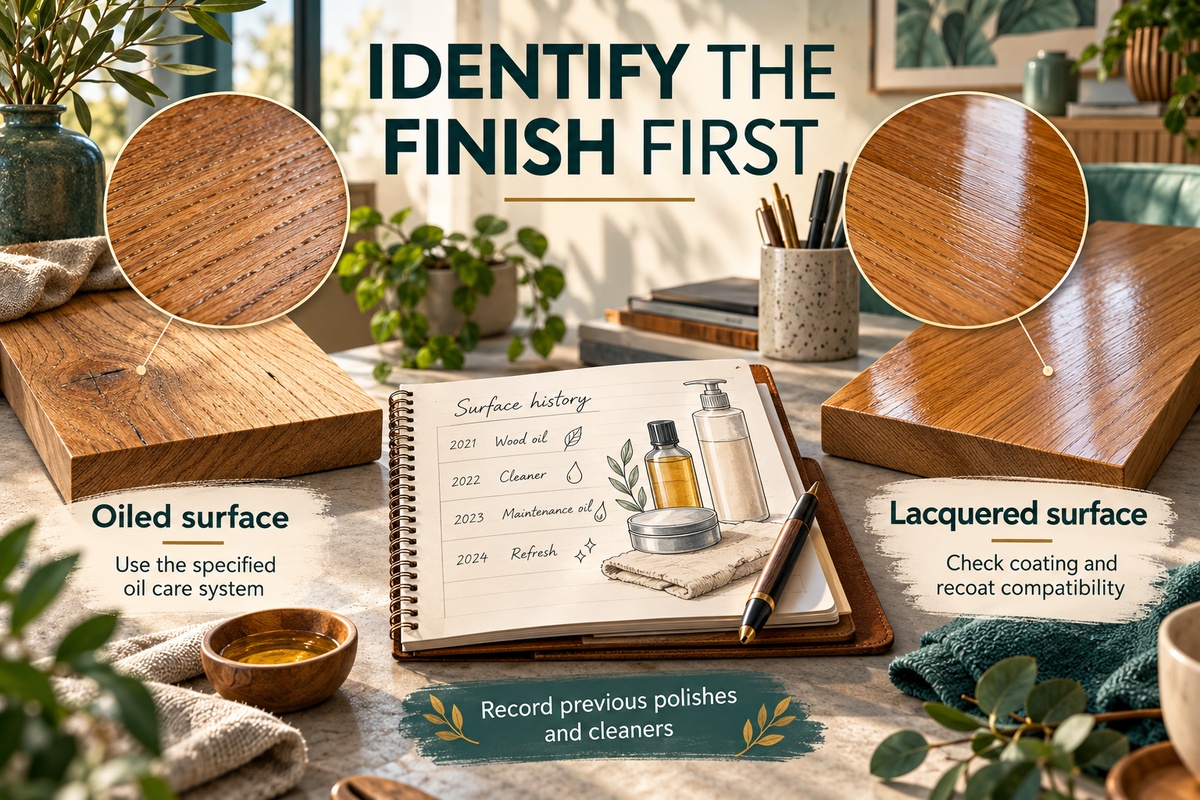
- Identify whether the finish is a film-forming coating, oil or another specified system.
- Look for invoices, spare boards, product labels or previous finishing records.
- Note any polishes, waxes, oil soaps, silicone products or scratch removers already used.
- Check whether marks are isolated or extend across the main traffic areas.
- Look separately for stains, loose boards, moisture damage and exposed timber.
- For sanding, confirm remaining usable timber rather than relying on the original board thickness.
- Discuss the acceptable appearance of a local patch compared with a broader treatment.
A wood-look laminate or hybrid floor should not be treated as sandable timber. Even among real timber floors, a method suitable for one surface can damage another. The assessment offered through timber floor repair and restoration services should identify these differences before selecting a repair.
When a Surface Treatment or Recoat Can Help
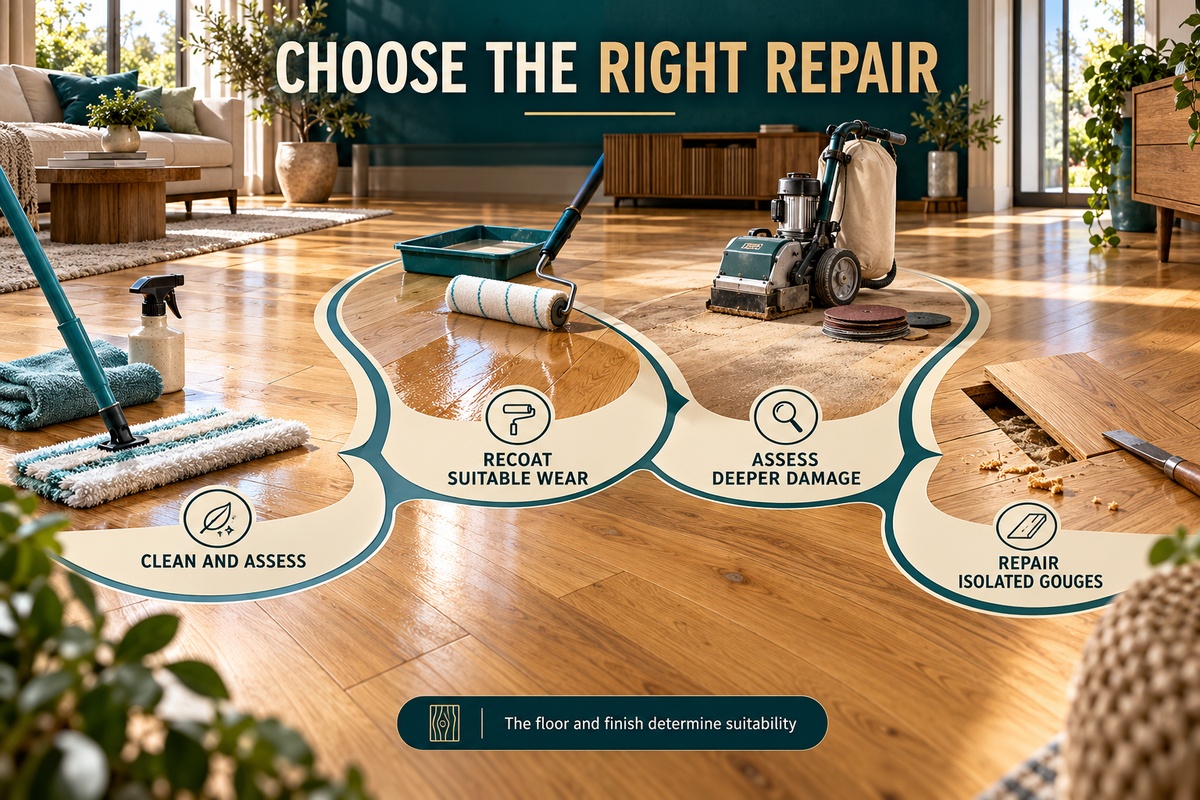
A less invasive treatment can be appropriate when the underlying floor and existing finish are suitable. The aim is to match the treatment to the actual defect rather than automatically removing timber.
Start with correct cleaning
Remove loose grit with equipment suitable for wood floors, then use the cleaner specified for the floor or coating. A clean surface makes it easier to distinguish scratches from streaks, residues and ordinary soil.
Avoid soaking the floor while trying to improve a mark. Work with the approved cleaning method and let the area dry before judging the result. If a film remains, repeated application of the same product may make assessment harder rather than improve the scratch.
Use maintenance products only when compatible
For some finishes, the manufacturer specifies a maintenance treatment for minor marks. The correct choice differs between oiled and lacquered floors, as shown in Bona’s pet scratch guidance.
That does not mean any polish is suitable for an unknown floor. A product that temporarily changes the appearance can leave a maintenance layer requiring removal before later recoating. Confirm suitability, follow the product instructions and test in an inconspicuous location where directed.
Consider a professional recoat
Recoating renews a suitable protective surface without the same timber removal as a full sand-back. Preparation, contamination removal and adhesion assessment determine whether the new finish can bond reliably.
It can improve fine surface wear, but it does not remove substantial gouges or flatten dents in the timber. A recoat is therefore most useful when the desired outcome is compatible with what it can achieve. Ask which marks are expected to remain, rather than interpreting a refreshed finish as a promise of a completely unmarked floor.
| Treatment | What it can address | Important limitation |
|---|---|---|
| Correct cleaning | Dirt and residue that make marks more noticeable | Does not replace worn coating or missing timber |
| Approved maintenance treatment | Certain minor surface marks on the specified finish | Product-specific; may affect future preparation |
| Professional recoat | Suitable surface wear and renewed protection | Deep timber damage can remain visible |
| Sanding and refinishing | Suitable deeper wear and coating removal | Requires enough usable timber and careful preparation |
| Local board repair or replacement | Isolated damage beyond practical surface treatment | Matching the surrounding finish remains a separate task |
When Sanding or Board Repair Makes More Sense
Some damage extends beyond what another coat can improve. The floor still needs assessment before a full sanding programme is chosen.
Deep scratches and worn-through areas
Where claws have cut into the timber or wear has exposed larger areas, sanding and refinishing may be appropriate. The objective is a sound prepared surface, not removing unlimited material until every mark disappears.
Very deep damage can remain below a sensible sanding level. In that situation, local repair or retaining some character may be preferable to thinning the floor excessively. Professional floor sanding in Sydney should begin with an assessment of what the floor can safely tolerate.
Engineered and previously sanded floors
The usable top layer of engineered boards constrains refinishing. Previously sanded solid timber also has limits, particularly around joints and fixings. There is no universal number of remaining sanding cycles that can be assigned just by looking at the room.
Factory texture, bevels and colour treatments also matter. Sanding can alter those features, so discuss the resulting appearance as well as whether the scratch can be reduced. A suitable recoat may preserve more of the original surface where the damage and product permit it.
Isolated gouges or damaged edges
A severely damaged board within an otherwise sound floor may suit a contained repair. Suitable replacement stock, fixing and support need checking, and an exact colour match cannot be guaranteed.
Pet urine stains are a separate issue from claw marks. Their depth and effect on the timber need assessment; sanding is not a guaranteed way to remove every stain. A repair plan should distinguish scratches, staining and movement rather than treating all pet damage as one defect.
Why Quick Scratch Fixes Can Leave a Bigger Patch
Food oils, furniture polishes and improvised colour remedies can change the look of a mark without restoring the intended finish. They may also leave contamination that interferes with later treatment. A floor-specific repair product is still product-specific: suitability should be established rather than assumed from the words “wood repair” on the label.
Sanding a small visible patch can remove stain or coating unevenly and expose a different timber colour. The result may be a pale halo larger than the original scratch. On textured or factory-finished boards, a local abrasive treatment can also change the surface detail.
A concealed test and a clear finishing plan are more useful than repeatedly trying stronger remedies. Where the coating history is unknown, keep a record of what has already been applied and share it with the person assessing the repair. That information can influence cleaning, adhesion testing and whether a local treatment is realistic.
How to Reduce Further Dog Scratches
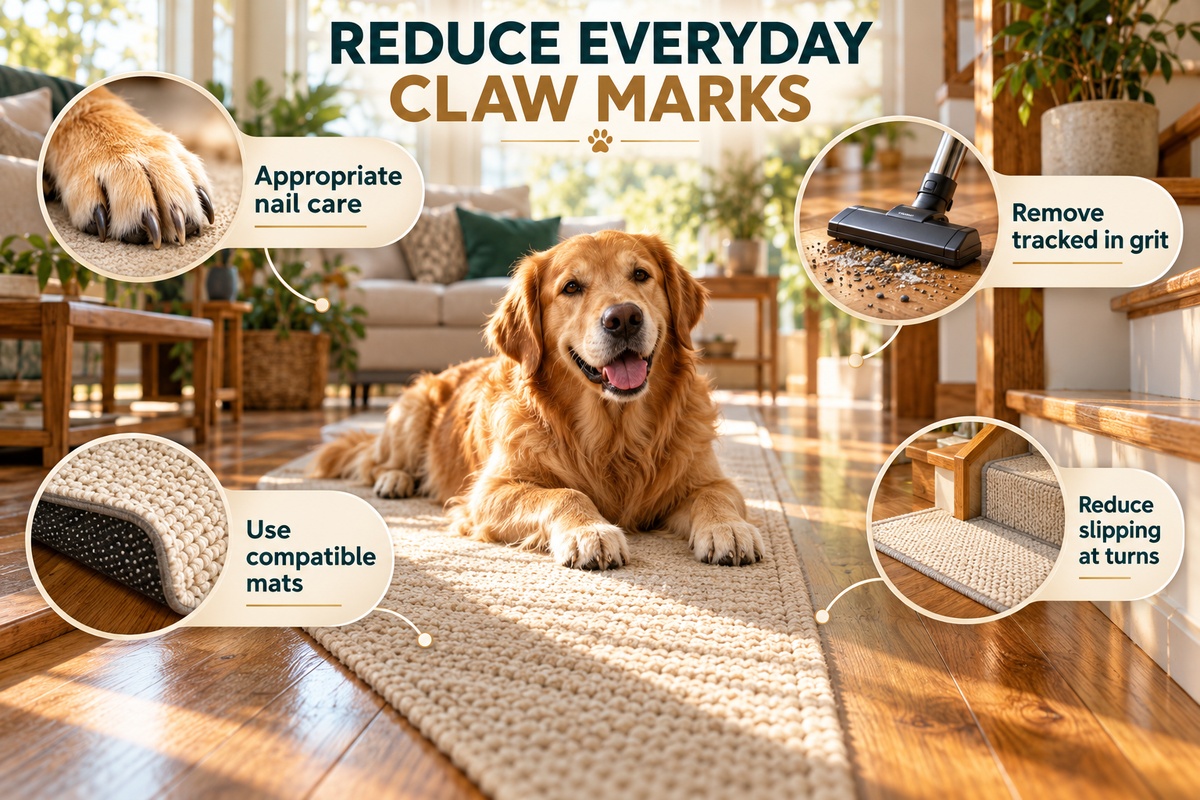
The most useful prevention plan addresses the way the dog moves through the home and the grit brought onto the floor. A durable finish helps with wear but does not make natural timber immune to physical damage.
- Maintain claws appropriately with advice from a groomer or vet where needed.
- Remove tracked-in grit using a soft brush, suitable vacuum head or dry mop.
- Place flooring-compatible mats at entrances and keep them clean underneath.
- Use secure, suitable runners at turning points or busy routes where practical.
- Avoid encouraging fast indoor games on slippery timber surfaces.
- Wipe up water and pet accidents promptly using the approved care method.
- Check the condition of the coating before wear spreads into exposed timber.
- Use rug backings and protective accessories approved for the floor and finish.
The manufacturer’s timber cleaning and care guidance provides a useful example of why cleaning equipment and maintenance products need to suit the installed floor. The best routine is the one matched to your product, not a generic household cleaning recipe.
Plan the Repair Around Your Dog
Arrange a separate area for the dog before preparation or coating starts. Open rooms, unfamiliar equipment and access routes need planning so the animal does not enter the work area or disturb fresh treatment.
Dry to the touch does not automatically mean ready for claws, furniture, rugs or normal household activity. Follow the chosen coating’s instructions and the installer’s handover advice for re-entry and full use. There is no single waiting period that fits every finishing product and site condition.
After the floor is ready, reintroduce furniture and compatible mats carefully. If the dog regularly slides at the same doorway or corner, address that route rather than relying on a new coat to prevent the same marks returning.
Frequently Asked Questions
These questions help separate a cosmetic improvement from a repair that changes the timber surface. The right answer depends on the floor and finish already present.
Can dog scratches be buffed out of timber floors?
Some light coating marks can improve through suitable maintenance or professional preparation and recoating. Buffing is not a universal fix for deep scratches or dents. Abrasive work can also change sheen, so identify the finish before attempting it.
Does a fingernail catching mean the floor needs a full sand?
No. It indicates surface relief but does not identify the exact damage or the repair method. A local gouge, a dent with intact finish and a scratch through the coating can feel similar while requiring different decisions.
Will a stronger coating stop dog claw marks?
A suitable coating can improve wear performance, but it cannot make the timber underneath immune to indentation or scratching. Prevention, appropriate maintenance and realistic expectations remain important, particularly in busy turning and running areas.
Can engineered timber floors be repaired after dog scratches?
Often, but the method depends on the product and damage. Compatible surface maintenance, recoating or local replacement may be options. Full sanding requires confirmation that enough suitable timber remains and that the resulting surface will be acceptable.
Does the whole house need sanding for one scratched area?
Not automatically. A local repair or room-wide treatment may be suitable. Coating compatibility, visible boundaries, colour and sheen determine how far the finishing area needs to extend. The smallest physical repair is not always the least noticeable visual result.
Book a Timber Floor Scratch Assessment in Sydney
For dog scratches on timber floors, a clear diagnosis helps avoid unnecessary sanding or an unsuitable surface treatment.
Photograph the marks in ordinary light and across the reflected light. Include any flooring, finish and cleaning-product details.
Contact 5Star Wood Care Sydney to discuss the damage and whether local repair, floor polishing or sanding is appropriate.